
Although there's nothing wrong with that if it's what you prefer.
I'm no expert, but I'm willing to share what I know and hope you'll do the same.
In a long-term TSHTF situation, you might need to know how to clothe yourself. Even before that, there's a skill that comes in handy. And that's making buckskin-- without chemicals.
This is copied straight from my liberty blog (https://blog.kentforliberty.com/2012/04/making-buckskin.html):
First of all, are you wanting buckskin or a hair-on hide? Deer hair is brittle and will always shed BAD, and it is very hard work to get a soft hair-on skin using natural methods. I will explain the buckskin method, but if you want hair-on, you just eliminate the hair removal step, and (contrary to what you might imagine) add a few more hours of very hard work to the "braining" and drying process.
Either way, pull the hide off without using a knife if at all possible. If you DO need to use a knife, make sure it doesn't score the skin at all. NO SALT! Take out the brain and save it. If you can buy any pork or beef brains anywhere, get a few extra pounds. (Save the strips of sinew that are on either side of the backbone, too, if you want thread.)
When the skin is off the animal you need to "flesh" it. Without cutting into the skin at all, scrape off all of the meat, tallow, fat, and membrane. (I always save the tallow and make various good stuff with it) A 90-degree angle edge on a steel bar is better than a knife blade if you have a rounded surface (like a smooth log) to lay the skin over. And then you can grip it on both ends to really push it down the skin. It's a very good way to build arm muscle.
After the flesh side is completely clean of all tissue and membrane you need to stretch the skin in a frame to let it dry. You need to be able to get to both sides, so don't just nail it to a wall.
Once the skin is completely dried, you need to use a sharp blade to scrape off all the hair. A rounded blade that is sharp and that has a handle perpendicular to the edge helps. I made my own with a big leg bone and a plane blade that I ground off round.
This is the messy, miserable part of the process. The hair goes everywhere and clings to everything.
Scrape the hair and the epidermis away. Be careful because it is very easy to pop through the skin since it is parchment (and paper-thin) at this point. After all the hair is removed use medium sandpaper (or sandstone rocks) to sand both sides of the skin until it is nice and fuzzy (on a small scale anyway).
(If you are not in a hurry, the stretched, dried skins can be taken out of the frames and kept indefinitely, as long as you protect them from critters and moisture. I used to get a bunch of hides ready and then wait for nicer weather for the finishing steps, but yellowjackets LOVE the brain solution, and doing the braining in winter avoids that complication.)
Then, once you have sanded the skin, take the skin out of the frame and hose it down to make it wet and flexible again.
Now, boil the brains in a little water until they go from pink to pinkish-gray and smell "cooked" ( hate this smell). Put the cooked brain -or two (more is better)- in a couple of gallons in a 5-gallon bucket. Make sure it is not hot or it will cook the skin. Lukewarm is OK. Stick the skin in the solution and get it very saturated. Five minutes or so, with you stirring it around in the solution, should be good.
Take the skin out and wring it out. Put it back in the solution, saturate it, then wring it out again. Repeat. Repeat. Repeat. The biggest mistake I used to make was not repeating this step enough. I have never done it too much but have not "brained" it enough lots of times. I would put it in the brain solution and wring it out at least 5 or 6 times, and 10 or 12 would be better.
Now, you can either put the skin back in the frame, or you can work it by hand. Either way, you want to pull, stretch, twist, tug, and otherwise abuse the skin until it is dry. Do not stop until it is totally dry or you will have hard spots in the hide. You will notice it getting whiter as it dries and stretches, and it will start to fluff up. Once it is dry, it should feel like thick, luxurious flannel, and be an off-white color.
Now comes the smoking. This gives it its color, its moth-proofing, and its ability to not be destroyed by water. Find rotten "punky" wood. It should be crumbly. It doesn't matter if it is a little damp.
Sew or staple the skin into a bag shape. You can put two skins together to save time and trouble. Just try to make sure there are no dead spaces where smoke can't go, and stitch any holes closed. For safety's sake, I'd also sew a sleeve of cloth onto the mouth of the skin bag so that the skins will be farther from the fire while smoking.
You will need to make a small fire and let it burn down to coals. If you can make it somewhere that you can have a small chimney or pipe, and something above it to hang the skins from, it is easier. When the fire has burned down to coals, hang the skin bag over the coals, trying to seal around the fire, with the cloth bag or the edge of your skin bag, so that you can direct the smoke up into the bag and force it to go through the skin.
Then toss on the punky wood and seal everything up, but keep an eye to make sure the fire doesn't flame up again. You want smoke, not flame. (if it does flame, just pull the bag off of the fire until the flame dies). Let it smoke until you see brown color soaking through the skin. Remember that any spot where you didn't get all the membrane or epidermis off will not get good smoke penetration as fast as the rest. And, anywhere the skin bag touches itself will also not be getting enough smoke, so keep adjusting as it smokes. The browner you let it get, the better the color will last. (Most of my stuff has lost most of its color now, although it still has the protective qualities) Then, turn the bag inside out and smoke the other side in the same way for a while. And you are finished. If you saved the sinew from alongside the deer's spine you even have your thread to use to make some nice things.
If you have any questions about things that didn't seem clear, make a comment and I'll try to answer them.
One of the more fun things (to me) that qualifies as prepping is stocking up on ammo.
While prices are better now than they have been in a while, I was still having to travel an hour and a half to find prices that made sense. Locally, ammunition was 2 or 3 times the price that I could pay in the bigger city 90 miles away.
Fortunately, that situation has recently changed, but I found a great way to deal with it before the change, and I'm sticking with it, too.
It's a business called Ammo Squared. You sign up and subscribe for a set dollar amount and they set up an ammunition account for you. Then you can have it shipped to you.
If you use my link-- https://ammo2.me/dullhawk --and spend at least $20 in the first month, both you and I get $25 in free ammo. That's a pretty good deal. Then, after you've set up your account, you can share your own link with your friends and both of you can get free ammo the same way. It's kind of awesome.
If you wait until you have an account value of over ...
Every little bit adds up.
Due to medical situations, I've found myself without money to spend on larger projects such as firewood-- which might be a problem-- but there's always something you can do to prep.
A recent project for me was getting all my oil lamps ready to go. That's not the only alternative lighting I have, but it's my favorite.
I checked and changed the wicks (where needed), cleaned off any dust that had accumulated, and topped off the kerosene. You may prefer liquid paraffin since it stinks less, but I have gallons of kerosene on hand. I only broke one chimney, and I had a spare. (Note to self, keep an eye out for more chimneys at thrift stores and yard sales.)
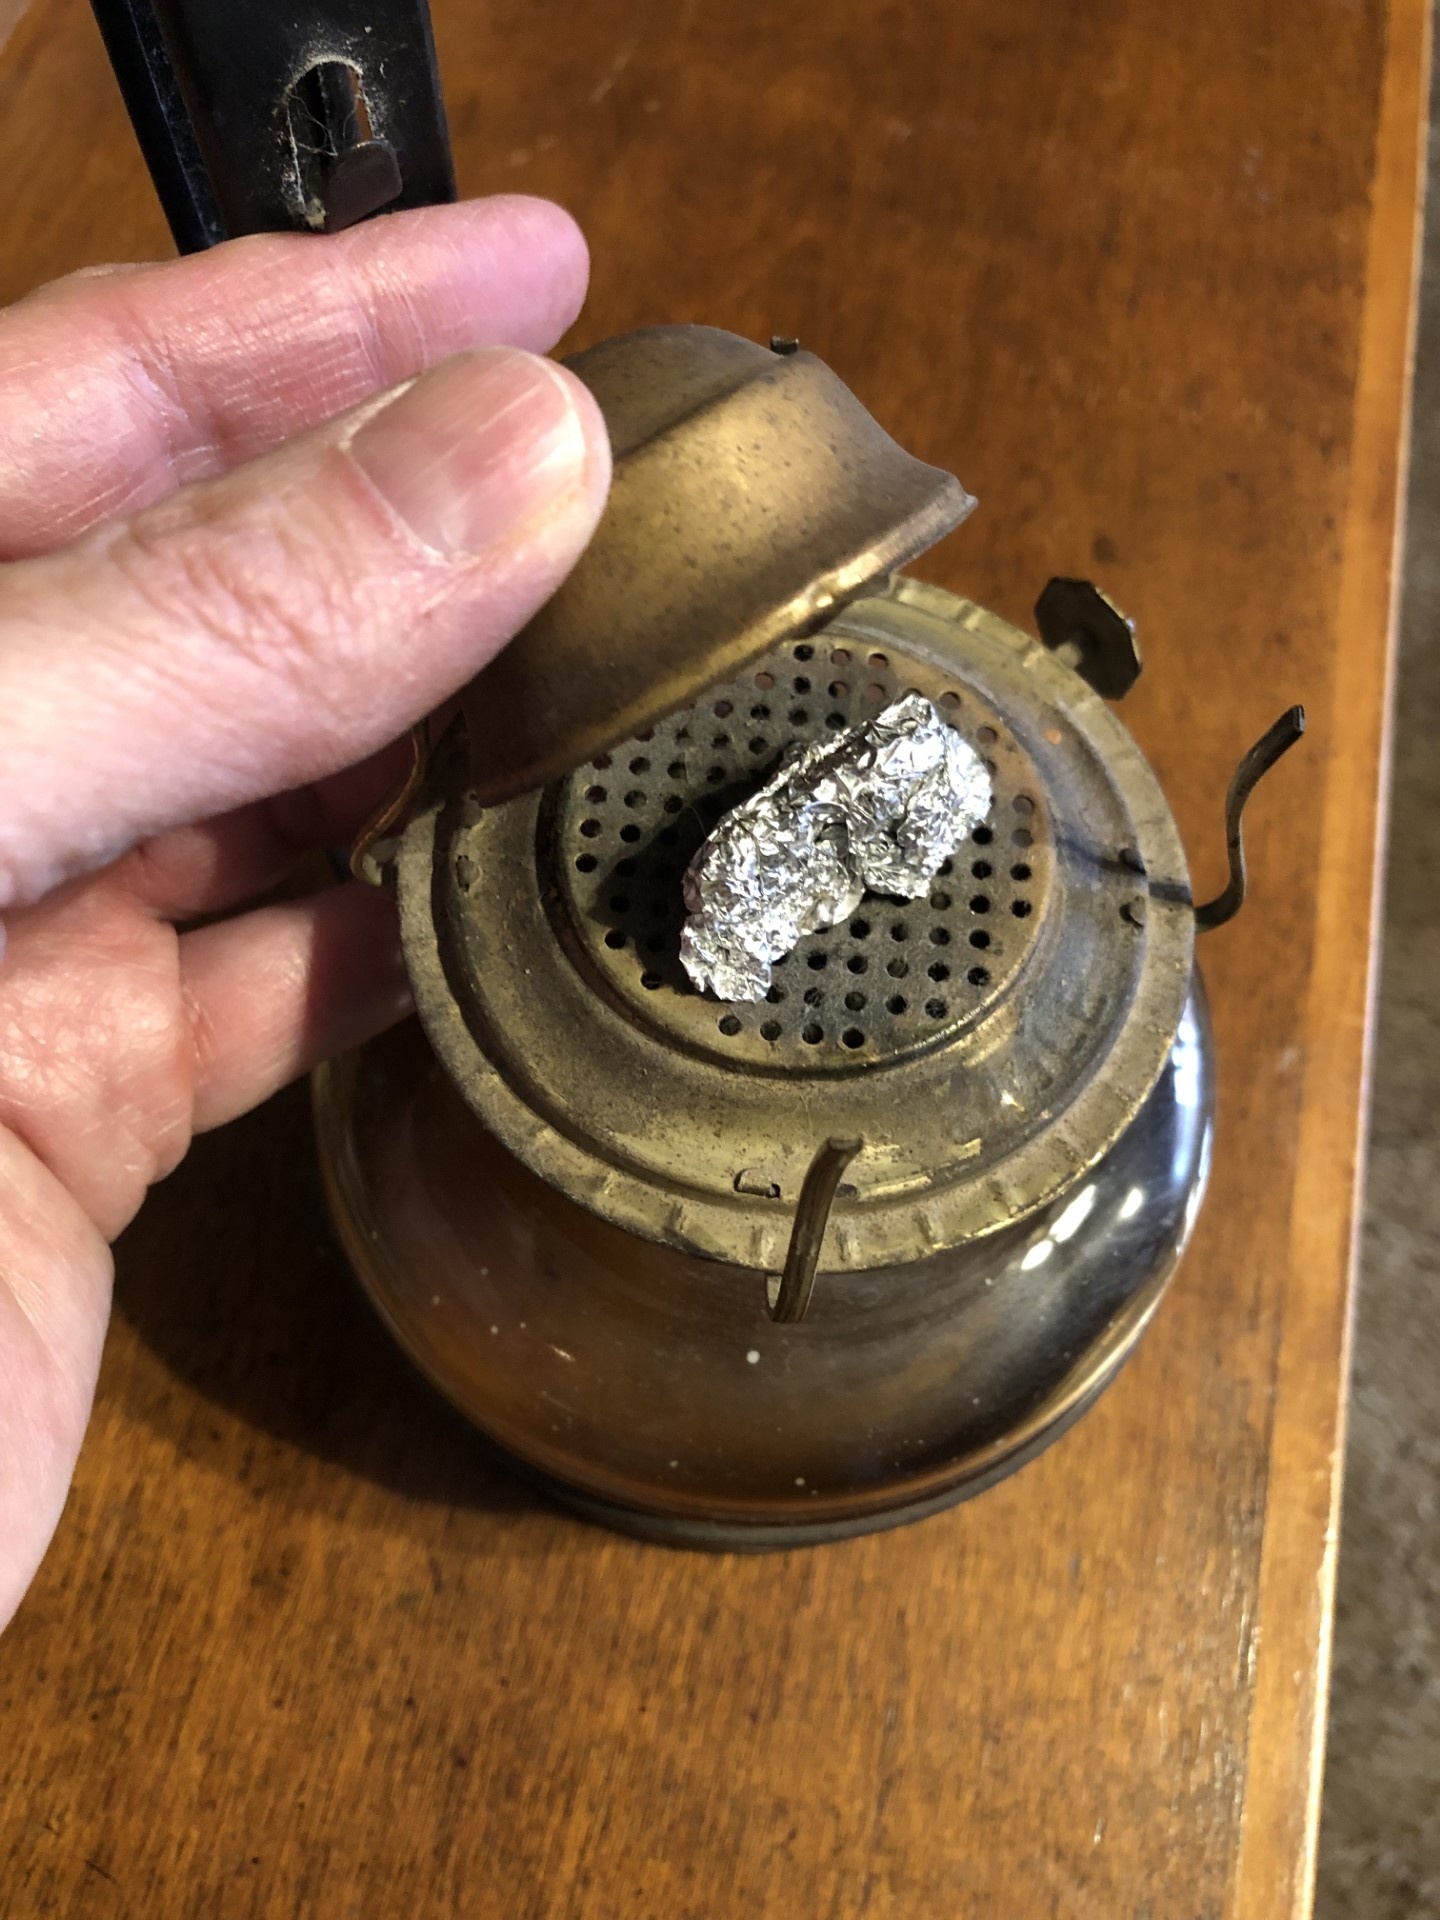
I also decided to try to address a minor problem with the lamps. If you have oil lamps that you don't use all the time you'll know that the oil evaporates. This time I did something I hope will slow that process.
I covered the wick slot (don't know the technical name, but look at the photo) with aluminum foil I had...
The slow slide toward collapse is harder on me than a quick implosion would be-- I think (since I've never really experienced an implosion). I hate the waiting.
I'm as ready as I'm probably going to get. The longer this drags on, the more of my preps will need to be refreshed.
My gardening was an utter failure. I will need to rely on the stuff that grows naturally rather than garden foods if the collapse gets to that point this year. I knew that was a possibility because I'm so bad at gardening. So, no real surprise there.
I probably ought to do some work on my bike to get it working better-- but the reason it has problems now is that I did some work on it last year and screwed things up. Doing more work on it might not benefit its functionality the way I hope it would.
I would like to get more firewood. Trees don't grow naturally in this region, so that means buying firewood from those who travel to collect it. I can usually find cheap wood that's not great, but burns. I had an ...